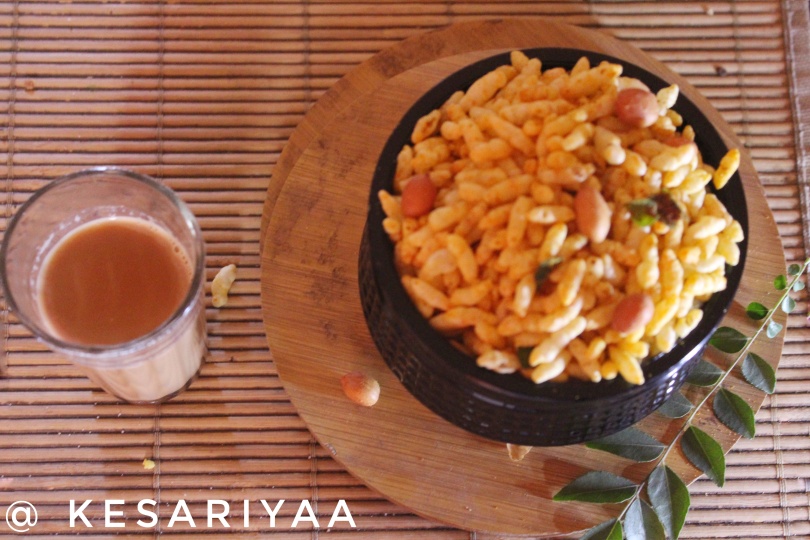
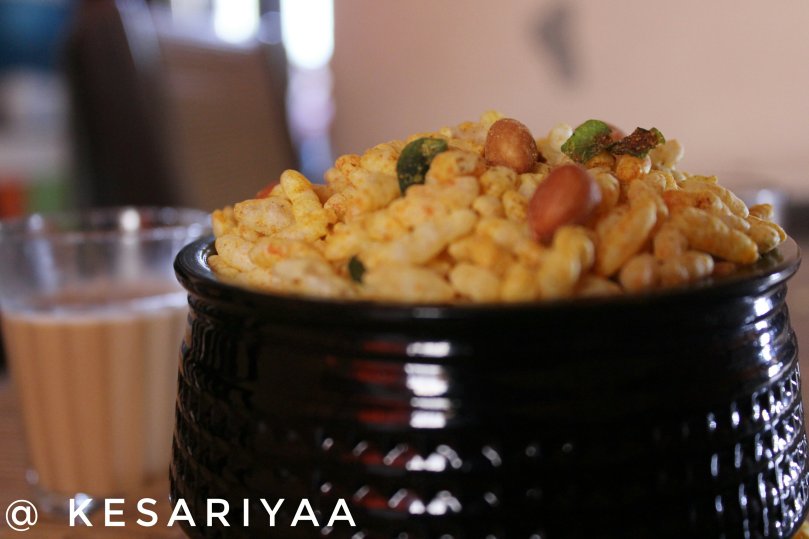
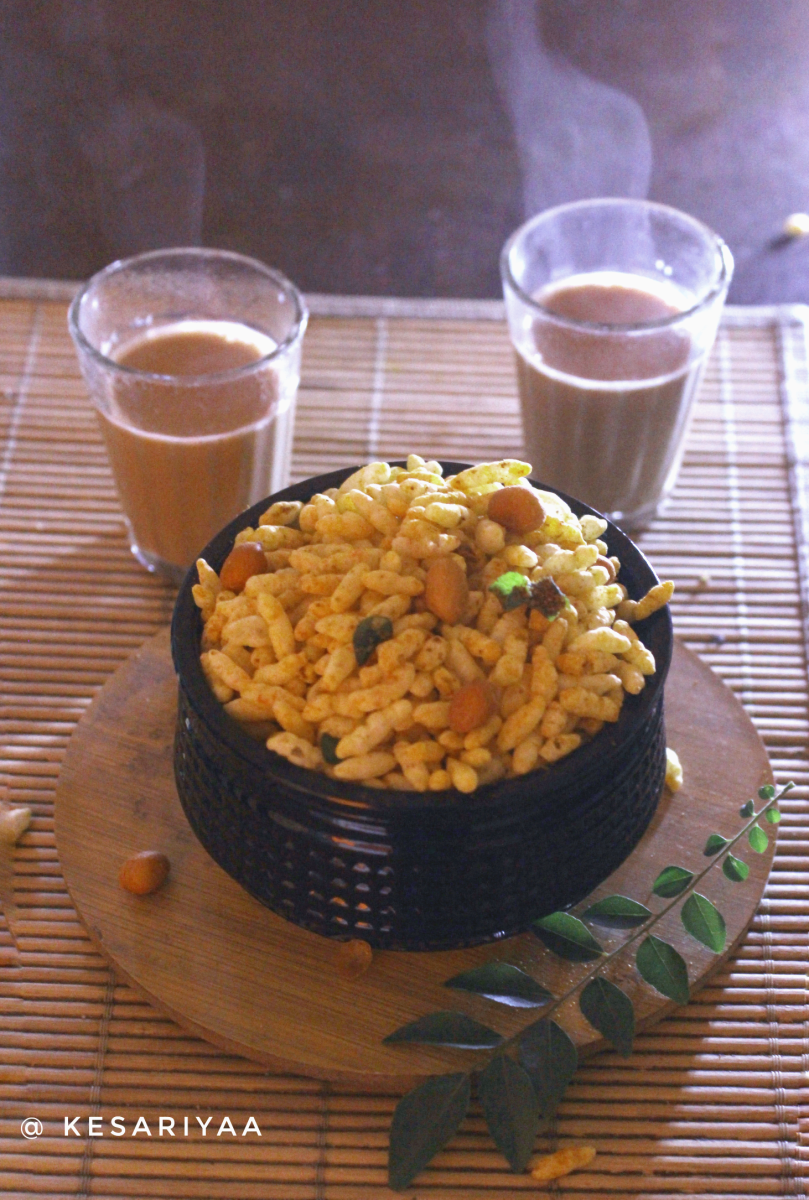
If there is one quick and easy snack that you can prepare – it is this spiced puffed rice mixture. It is crunchy, spicy and a perfect snack with your evening cup of tea… and it really takes 10 minutes to put together!
Rice is a staple in India and you will find it prepared and eaten in so many different ways.
Puffed rice is a handy snack as is, or you could dress it up and make this spicy mixture. Bhadang, as it is called in Maharashtra, is very popular because it satisfies your craving for a fast food but it is still quite healthy at the same time and easy to prepare.
Without further delay, let’s go to this quick and easy recipe right away.
Here is what you will need-
Puffed rice – 250 gms*
Red chilli powder – 1 tsp
Kanda lasun masala – 2 tsp
Metkut* – 2 tsp
Salt to taste
Powdered sugar – 2 tsp
Oil – 2 tbsp for tempering
Curry leaves – a handful
Raw peanuts – a fistful
Mustard seeds, turmeric and asafoetida for tempering
Here is the step wise procedure-
Sieve the puffed rice through a colander and clean it to check for any small stones or half puffed rice grains. Set aside.
In a big kadhai, heat oil then add the mustard seeds. Once the mustard seeds pop, add the curry leaves and peanuts and roast for a few minutes. This will ensure that the curry leaves and peanuts become crunchy after the mixture is cooled down.
Next, add in the turmeric powder, asafoetida and stir to combine. Add in the puffed rice and all the spices, and mix well so that puffed rice is coated well with the tempering.
Take the kadhai off the flame, add salt and powdered sugar and stir the mixture in quick tosses to ensure salt and sugar is mixed well. Put the kadhai back on the flame and stir only for a couple more minutes.
Let the mixture come to room temperature. Bhandang is best eaten with a cup of tea or as is!
Store the cooled mixture in an air tight container.
As always do let me know if you prepare this recipe. I would love to hear from you!
Notes: Kanda lasun masala is a spice powder made from onions and garlic with some other ingredients. You can find it in most grocery stores. Metkut is again a dry spice mix which is used as a condiment. You can skip using it if you do not find it.
I am sure many of you must have made resolutions to eat healthy, loose those extra pounds, etc. this year too. How many of you really keep your resolutions of eating healthy homemade food?
If you are serious about it this year, I have got a perfect recipe for you today!
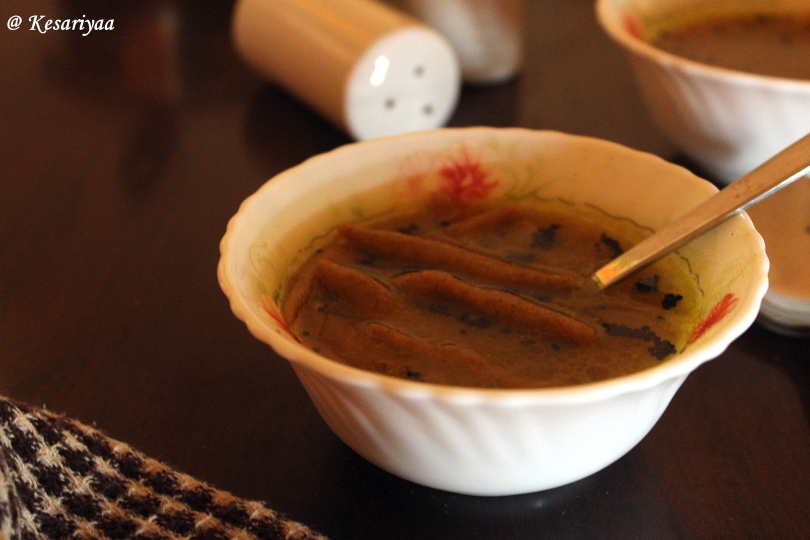
Hulagyachya shengolya is the most hearty, flavourful, nutritious and easy to prepare dish you could think of. Made from horsegram (called hulage/kulith in Marathi) flour and generously spiced with green chillies and garlic it also makes for an excellent comfort food during winters.
Horsegram is truly a powerhouse of nutrients for our body and is known for its multifold health benefits.
Anything made with horsegram flour (kulithache pith) is my absolute favorite! These shengolya are no exception – loosely translated these shengolya in a chilli-garlic spiced broth can be best described as past soup. Since horsegram is gluten free, this dish is naturally gluten free and vegan too.
With a short list of ingredients, and less cooking time this recipe will become your favorite just like it is my favorite dish. This can be served as a one pot meal or even for breakfast on busy mornings!
Here is what you will need-
For the pasta:
1/4 cup horsegram flour
1/2 teaspoon turmeric
Salt to taste
Water, to make the dough
For the broth:
1 tsp oil, 1/2 tsp turmeric, a generous pinch of asafoetida, and few mustard seeds for tempering
1 and 1/2 cups water
Salt to taste
5-6 big garlic cloves made into rough paste
2-3 green chillies (spicy variety) made into rough paste
Here are the step wise instructions-
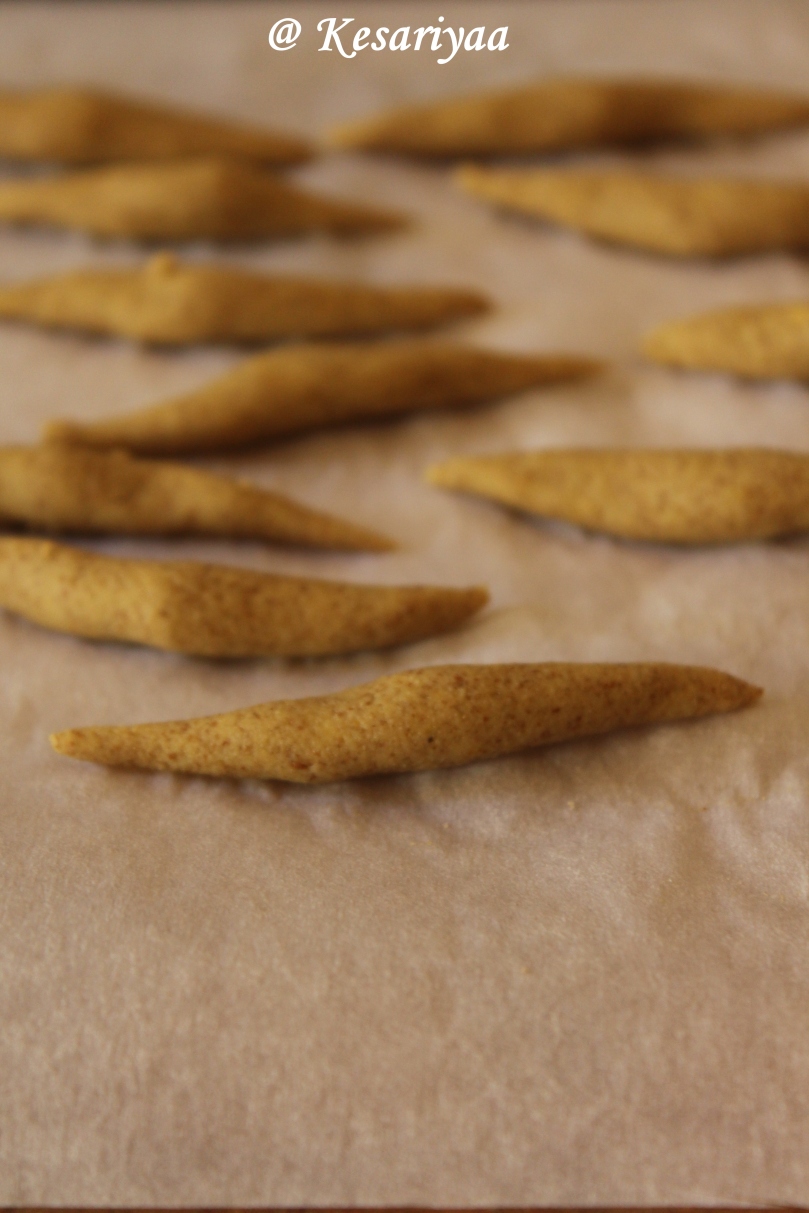
Prepare the pasta dough by mixing horsegram flour, salt as per taste and little turmeric (for the colour). Add the water slowly and form a soft dough that can be made into a round. Check rolling a bit of the dough in a small rope shape. If the pasta holds its shape, your dough is ready. If the dough crumbles in your hands, add slightly more water and knead gently.
In the mean time, make the chillis and garlic paste in a mortar and pastel. The paste does not have to be very fine, a few bits and pieces of chillis and garlic are absolutely OK.
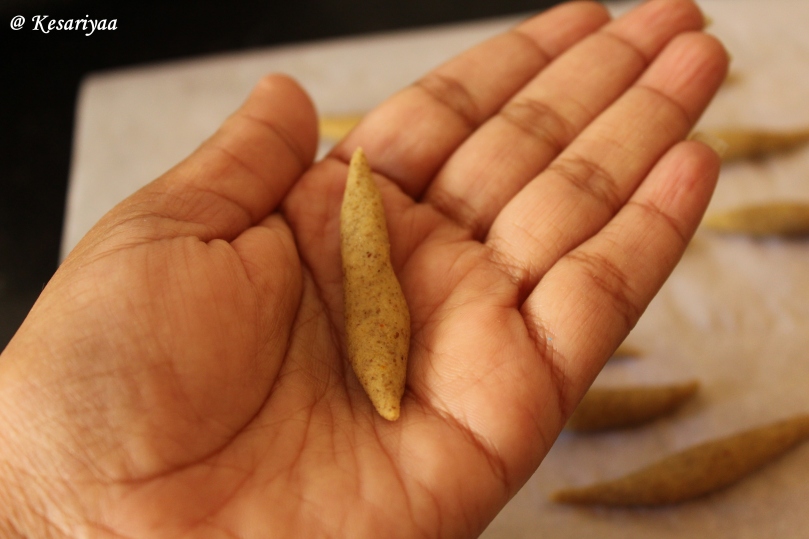
Make small rounds of the dough and roll them between your palms as shown in the picture. Roll all the dough.
While you are shaping the pasta, heat a deep kadhai/wok on medium heat. Heat the oil and prepare the tempering by adding mustard seeds. Let the mustard seeds pop. Then add in the asafoetida, turmeric and water.
Bring the water to boil. Add salt and green chillis and garlic paste, and boil for a couple of minutes.
Now start adding the rolled pasta to the boiling broth. Add only few at a time so that they do not form into a big lump. This pasta cooks really quickly. The pasta is cooked through when it starts floating on the top instead of sinking to the bottom of the pan.
Keep adding all the pasta in batches. Once done, simmer the broth with the pasta for 4-5 minutes. The pasta looses some dough while boiling giving some body to the broth.
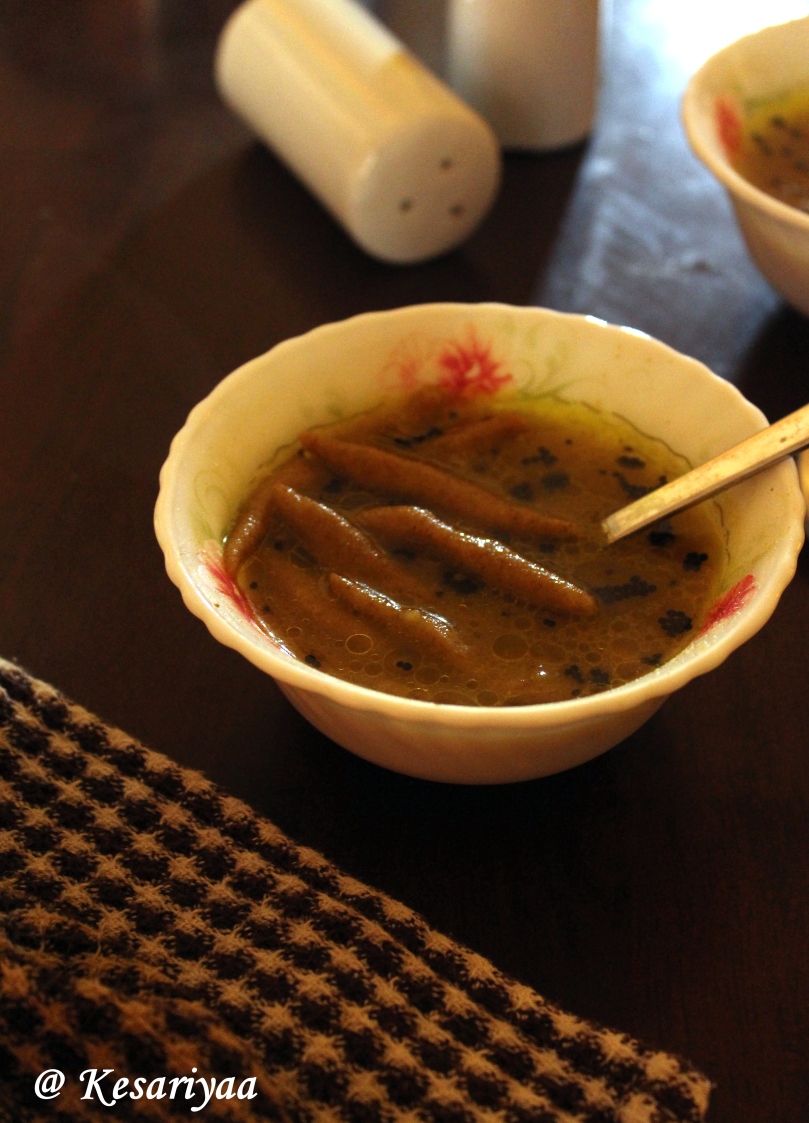
Reduce the broth to your desired consistency – I would recommend keeping it quite runny to slurp on it while you enjoy the pasta.
Switch off the flame and serve hot. You can add a dollop of homemade ghee while serving. Do not serve with ghee to keep it completely vegan. Enjoy this dish hot/warm on a winter morning; you can thank me later! 😉
Recipe notes: If you do not have access to horsegram flour, you can make this recipe with jowar (sorghum) or bajra (pearl millet) flour.
Ladies and gentlemen, this is a cake that gave me some quick fame.. literally.. I baked this cake and posted a couple of pictures on Home Bakers Guild, a closed group of bakers and bloggers on Facebook. Within a few hours so many people liked and commented on it.. I was overwhelmed with this warm response I received.
It was not my plan to post the recipe really.. but it is for all those lovely guild members that I am sharing this recipe for mosambi (sweet lime) cake with you all.
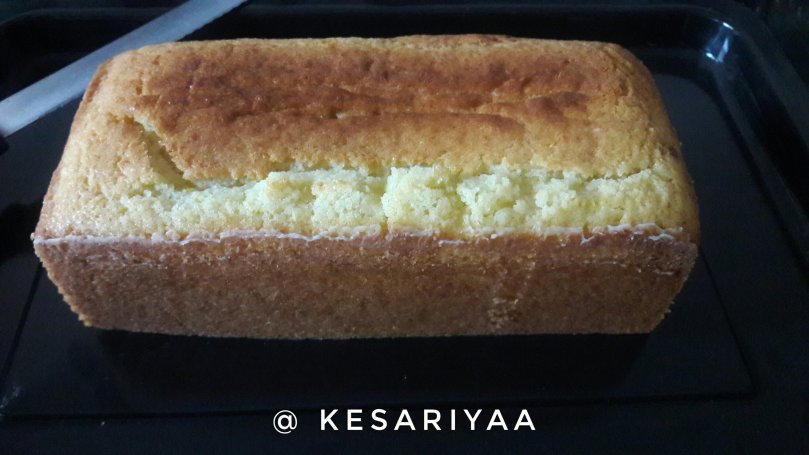
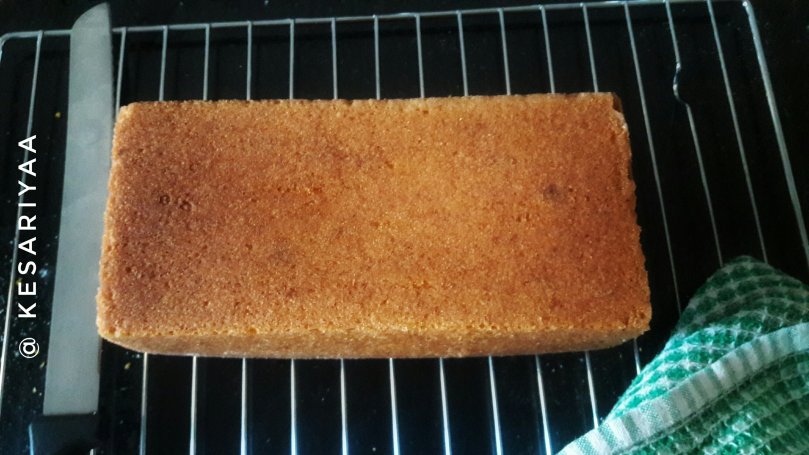
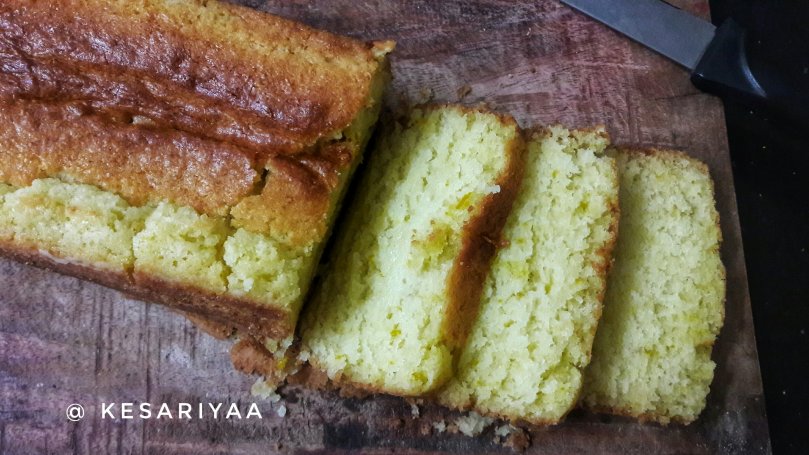
Just look at the colour and texture of the cake – I was mighty pleased with results… mind you this is an eggless one!
Also there is nothing very fancy or complicated about this cake, some simple basic pantry ingredients come together to bake this magic! It is so amazing to see that mixing those basic ingredients gives you such beautiful results, isn’t it?..
Let’s just dive right into the recipe!
Here is the list of ingredients-
All purpose flour (maida) – 1 1/2 cups
Milk – 1/2 cup
Yogurt/curds – 1/2 cup (if there is a lot of liquid in the yogurt/curds, remove excess water – you do not need greek yogurt or completely set yogurt but you do not want too much liquid either)
Sweet lime (mosambi) juice – from 2 medium sized sweet limes
Unsalted butter – 6 tbsp; melted and cooled to room temperature
Castor sugar – 3/4 cup
Baking powder – 1 tsp
Baking soda – 1 tsp
Zest of 2 small to medium sweet limes
Zest of 1 lemon
Pinch of salt
More butter and flour for the pan.
As the list of ingredients, the recipe cannot get more simple than this…Here are the step wise instructions-
Preheat the oven to 180 degrees Celcius for 15 minutes. Prepare a loaf pan by greasing well with butter and lightly coat with flour, removing excess flour.
In a small bowl, take castor sugar and add sweet lime and lemon zest. Rub the zest and sugar with fingers so that the sugar becomes fragrant with the zests. Keep aside.
In another big bowl, take the yogurt. Add lime-zested sugar and mix until sugar is dissolved. Next, add in the melted and cooled butter and sweet lime juice. Mix well but gently till all the ingredients come together.
In a separate bowl, mix together flour, baking powder, baking soda and salt. Break the lumps in baking soda if any. You don’t have to sift the mixture.
Now, add the flour mixture in the yogurt mixture. Mix the batter with a spatula using cut and fold method until combined. Add in the milk little by little and continue mixing. In the end, the batter should be velvety soft and shiny and falling in a ribbon off the spatula.
Pour the batter in prepared loaf pan. set the pan on the middle rack and bake at 180 degrees for first 15 minutes. Then reduce the temperature to 170 degrees and bake for another 20-25 minutes.
Cover the top of loaf pan loosely with aluminium foil if the top of the cake is browning too quickly. The cake is done when a toothpick inserted in the center comes out completely clean.
Enjoy the cake as a snack or on the side with tea or coffee.
I thank all the guild members again for such a great response for my post there.. I am truly overwhelmed and very happy!
Do let me know if you bake this cake. Feel free to share my page and blog with your friends and family of you like my work! 🙂
Welcome everyone to a brand new year! I hope you all had a fantastic time with your friends and family and are geared up to welcome the new year.
We had a simple celebration with our neighbors to say goodbye to the year gone by and welcome 2019.
I have been making a few interesting dishes over a past few days and I will surely post about them very soon.
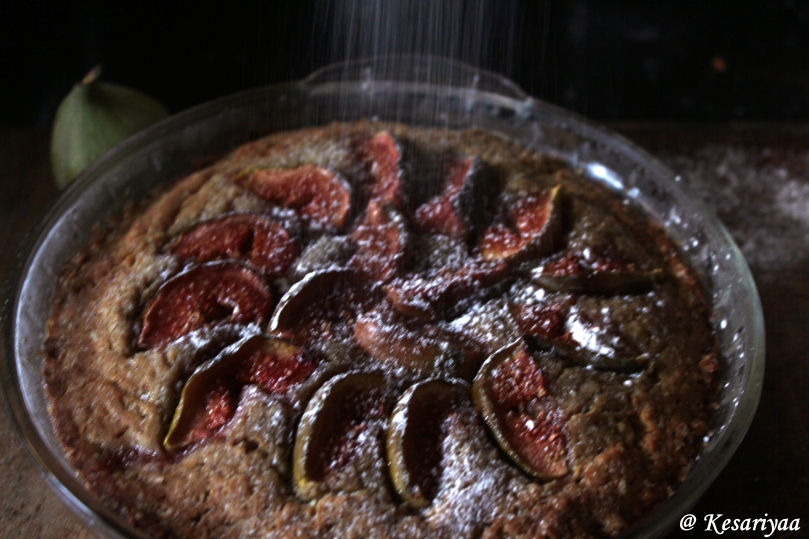
But let’s talk about this fresh figs cake I baked using whole wheat flour and almond meal. This is not a very fancy and fluffy cake – but it is rich in flavour and a perfect fit as a breakfast or coffee cake. It is somewhat dense due to the whole wheat flour although it surely had a great crumb (sorry, no picture of sliced cake for you!)
It is good to eat as is with a cup of tea or coffee or a glass of milk, and it can be served as a simple dessert with a sprinkling of powdered sugar and whipped cream!
These were probably the last figs of the season over here, and as much as my husband loves them I can’t eat them as is. I like seasonal fruits, but there is something with the fresh figs which I cannot stand … what better way to eat figs than to bake a cake! Anything tastes better in a cake, right? 😉
Who can say no to this beauty?
Let’s get right into the recipe now, shall we?
Here is what you will need –
1/4 cup almond meal – see notes
1/4 + 2 tbsp brown sugar
1 cup whole wheat flour
1 tsp baking powder
1/2 tsp ground cinnamon
3 eggs at room temperature, lightly beaten
4 tbsp butter, melted and cooled to room temperature
1 tsp almond extract
1/2 tsp pure vanilla extract
a pinch of salt
Zest of one lemon
Two medium to big size figs (more if you want to cover entire cake with figs)
Powdered sugar/vanilla ice cream/whipped cream – optional for serving
Here is the step wise procedure-
Grease the cake pan with butter and set aside. Preheat the oven to 180 degrees Celsius.
Clean the figs and cut each fig in 8 wedges. Set aside.
In a medium sized bowl, combine 3 lightly beaten eggs, melted butter, almond and vanilla extracts, lemon zest and whisk till eggs and butter are mixed together.
Add sugar and mix till the sugar is dissolved.
In another bowl, combine whole wheat flour, almond meal, cinnamon, baking powder and salt. Mix with a rubber spatula till all the ingredients are mixed.
Add the flour mixture in the eggs mixture and fold with spatula to mix together. Note that this mixture is quite thick, unlike normal cake mixtures.
Level the mixture with the help of spatula and arrange the figs wedges in a circular pattern.
Bake in preheated oven for 30 minutes. The cake is done when the center looks almost set and the cake starts to take a golden colour at the edges.
You could serve this cake warm with some whipped cream or vanilla ice cream or let the cake cool completely, then sprinkle with powdered sugar and enjoy with team/coffee or milk.
Notes:
You can make your own almond meal by grinding blanched or normal (skin on) almonds in a grinder or food processor. I ground the whole (skin on) almonds (1/4 cup almonds gave me about 1/2 cup almond meal).
Even if the figs are no longer available where you stay, you could top the cake with strawberries or blueberries. Dried figs can also be used.
Hi there! I hope some of my readers are still sticking around… The past one month was very busy on work front and even though I had some posts drafted, there was no time for taking pictures and publishing the post… I am a repeat offender.. I get lost in other life-things and then the blog just goes down in the priority list. 😦
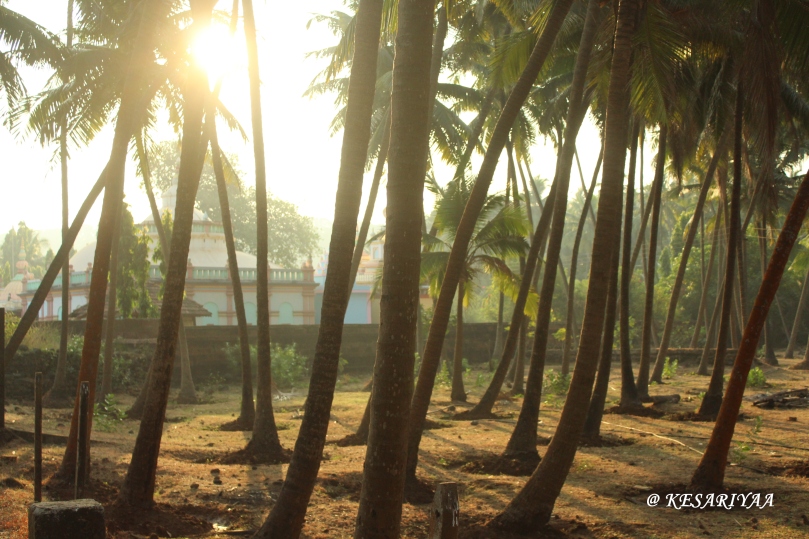
Well, today’s post is my last post this year.. and it is not about food. It is about a short trip we made to a quaint little village in Kokan (coastal part of Maharashtra). This place called Velaneshwar is still not known to many because it is still not very prominent on the tourist map. It is my husband’s ancestral village and we try to come down to unwind here probably every year.
There is also a very beautiful Lord Shiva temple that this village is known for. The deity called ‘Velaneshwar’ gives the village its name, and it is this avataar of Lord Shiva that is a family deity to many Kokanastha Brahmin families (including ours Gokhale’s).
The temple is nestled among the coconut trees and areca nut trees, and there is a very picturesque beach just behind the temple.
Velaneshwar temple – the village gets its name because of this templeThe road leading to the beach from outside the temple
This was a much needed trip for us – 2018 was very stressful year and we just wanted to take a short break before the new year unfolds its plans for us.
We decided to travel by train as we did not want to worry about driving and also wanted to save travelling time since it was just a two days trip. We also decided to travel light – we never do that – even this time we landed up carrying more warm clothes as winters are quite harsh this year; even in Kokan region which is quite hot and humid otherwise. We also decided to keep one day in hand before we start with another work week. So this was our itinerary –
Day 1 – Boarded train from Vadodara on Thursday at 9:47 PM
Day 2 – Reached Chiplun station at around 8 AM on Friday morning, took a rickshaw to Chiplun town. We had a great breakfast at Kane’s restaurant. This place has been around for more than 60 years. We had Misal Pav, tea and Dink (edible gum) Laddu – it was a perfect start for our day! The Kane restaurant is located near Chinch naka and is about 10 minutes walk from the state transport bus station.
We then boarded a state transport bus which will take us to a place called Modaka ghar (literally meaning a broken house – nobody knows why this place is called as such!). You have to board a bus which goes to Guhagar from Chiplun and ask for this particular place. There is only one bus that goes directly to Velaneshwar and it is early in the morning so one has to take the bus to Guhagar and then take another rickshaw from Modaka Ghar to Velaneshwar. Depending on how lucky you are the rickshaw can cost you anywhere from INR 300/- to 600/-, but as there is no other alternative you have no choice but to pay this huge sum for a distance of about 45 minutes!
We reached Velaneshwar at about 11:30 AM. We then got some tea, bathed and went to the temple. We stayed at a lodging and boarding facility that is available for the people coming to pay their visits to the temple, it is called Bhakt niwas (meaning place to stay for devotees of Velaneshwar). The care taker Patankar maushi (aunty) is very caring and talkative and we had best two days relishing the hot homemade food and lots of chitchats. 🙂
Staying at Bhakt niwas means quick access to temple, the beach and the bus that you have to take for your return journey. It is also not very expensive – our total cost for two people including stay, access to hot water, 3 times tea, 1 lunch, 1 dinner and 1 breakfast was about INR 900/-.
We went to the beach in the evening to catch the Sunset and it was every bit worth it. This also happened to be a full moon night and I could witness the moon rise from among the coconut trees. It was truly breath taking – Sun set on one horizon and the moonrise on the other!
Looks at the riot of colours!
Mesmerizing moonrise…
At the beach we enjoyed the evening leisurely, feasted on some hot Vada Pav, sipped on the tender coconut water, and made new friend – this tender coconut seller Thakur kaka (uncle)! He is a perfect example of happy and content Indian villager – we had fun talking to him. We had the best time there. 🙂
Patterns made by waves
My hero!
Sachin and Thakur kaka
Once back from the beach, we spent a couple of hours just relaxing, chatting with Patankar maushi and another Gokhale family visiting from Mumbai. We then had early dinner and called it a day!
Day 3 – Saturday – We started with tea and breakfast at the Bhakt niwas then got ready for the day’s travel ahead.
View from the balcony of Bhakt Niwas
My husband in front of a quintessential Kokani house!
We once again visited the temple and the beach, shopped for some local food items, and checked out of our rooms.
View of the Velaneshwar temple in the early morning Sun while coming from the beach. 🙂
We the waited for the bus that would take us back to Chiplun, just in front of the Bhakt niwas. We had booked our tickets to Vadodara from Ratnagiri, but a night before we decided to change the boarding to Mangaon (it made sense to travel in the same direction of the train to save precious 2-3 hours rather than travelling to Ratnagiri in the opposite direction!).
Again reaching Chiplun around lunch time, we enjoyed a typical Marashtrian meal at Kane’s, then walked down to the bus station and hopped on the bus towards Mangaon.
I was happy that we decided to come to Mangaon – see how cute this railway station is – just out of a fairy tale!
Mangaon railway station – you feel like you are in a wonderland!
How cute is this engine – the cutest I have ever seen!
… and another moonscape from the railway station!
It was so serene!
One last pic before leaving Kokan 😦
We reached back to Vadodara on Sunday morning at 6 with relaxed mood and quiet minds!
We had the best two days of 2018 and got ourselves pumped for what lays ahead in 2019! I am sure 2019 will be better and different than this year and I cannot wait for another set of adventures that the new year brings!
I have lots of plans for the blog and lot of things to accomplish so stay tuned and I will see you on the other side of 2018!
Thank you to all my readers (however small community that it is right now) and I wish all of you a very happy brand new year. 🙂
Whenever we visit Pune, we always wonder at the innumerable changes happening in and around the city, and we always keep thinking about how our beloved city is changing its face every now and then!
But few things in Pune will never change – and to top the list is Pune’s love for food and the number of eateries this city offers – it has got it all – big or small.
One such place that has never changed much in so many years is the Janseva Bhojanalaya, near Deccan. Even after spending so many years of my life in Pune, I never could go to this restaurant to have a perfect Maharathrian meal. So when we went to Pune to celebrate Diwali, we decided to go for lunch at Janseva. Believe it or not, we had to wait for more than an hour to get seated and enjoy our lunch.
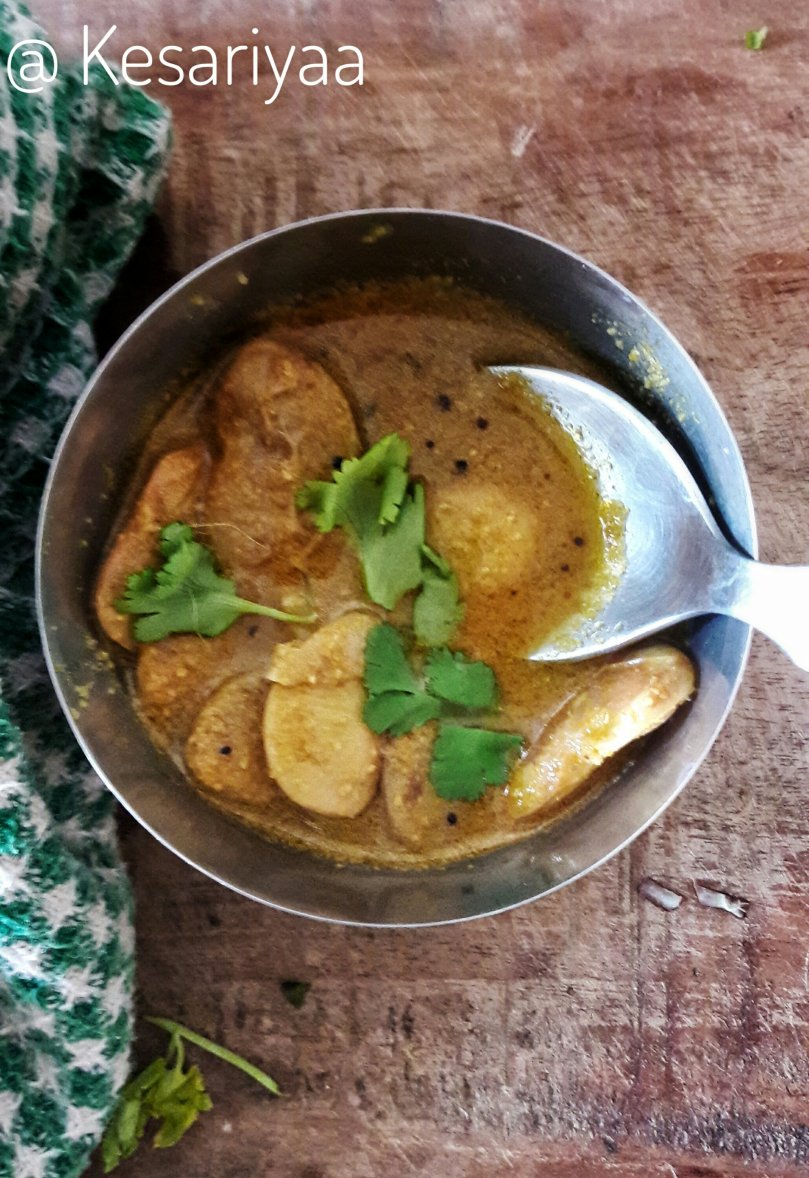
On the festive spread, apart from three desserts and couple more curries, was this double beans/rangooni vaal curry. I have never eaten this before, and it was definitely love at first bite ;).
I like the curry so much that I decided to make it at home – and I am quite happy to report that I was able to replicate the taste of this curry in my own kitchen. 🙂
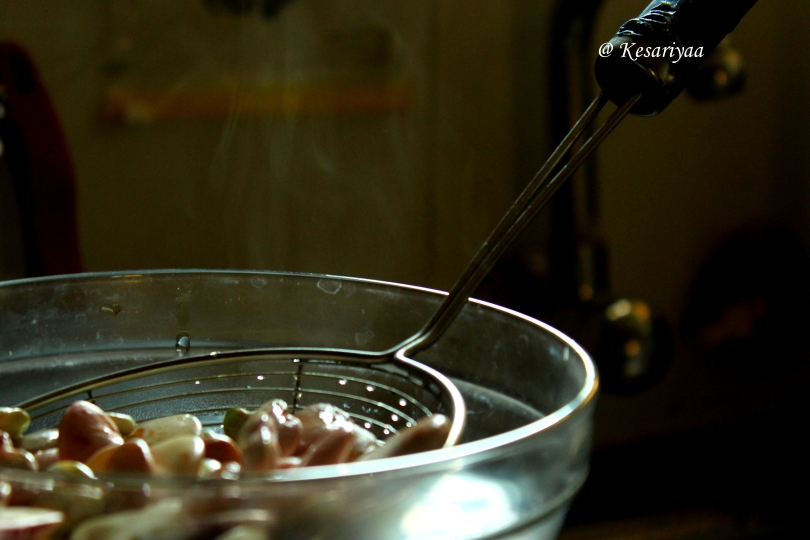
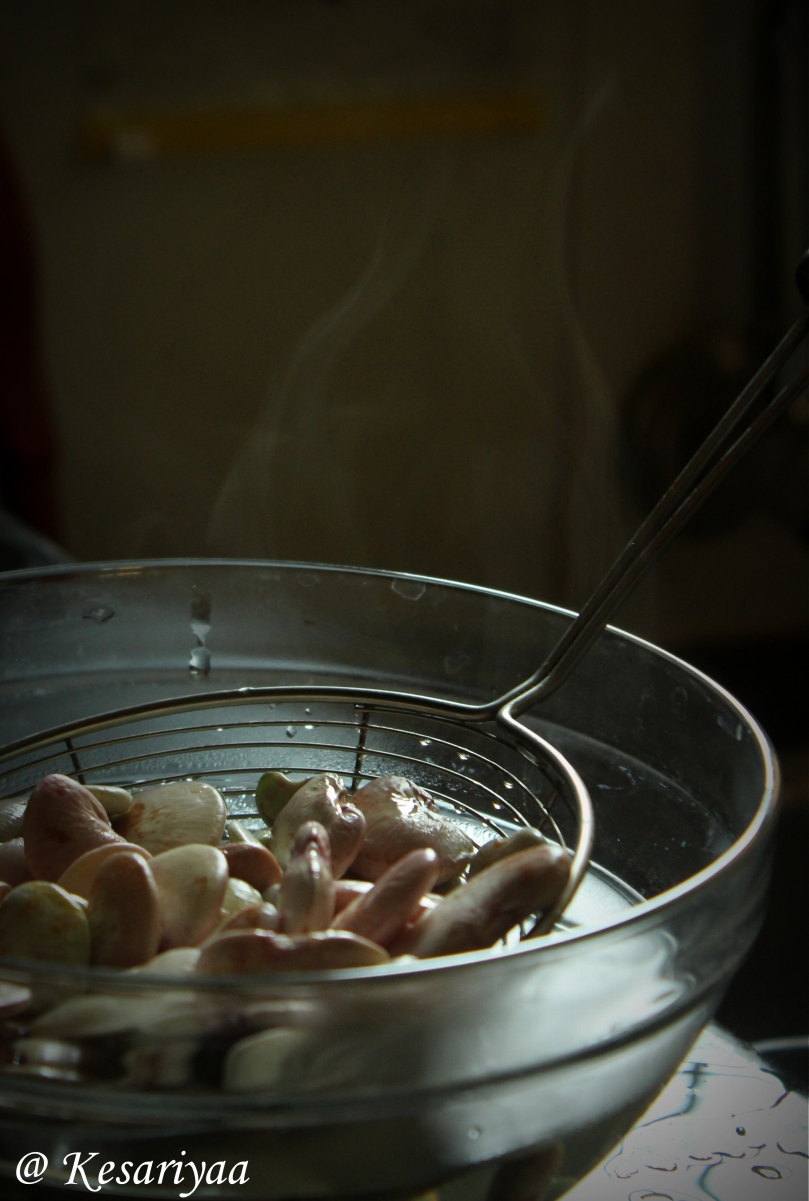
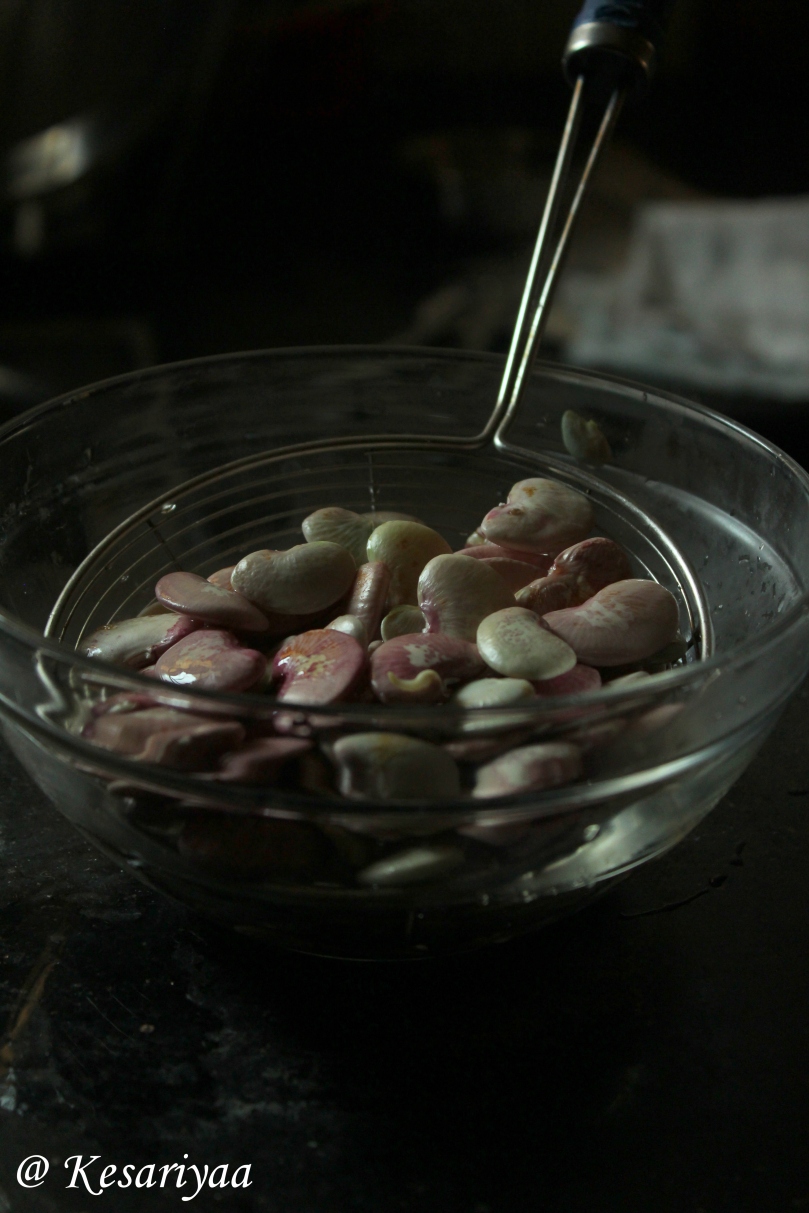
Before I came back to Vadodara, I visited Pune’s very famous veggie market and got these beautiful beans to carry back home. Aren’t they gorgeous?
Double beans/rangooni vaal, all washed and ready to be cooked!
Let’s get right into the recipe, shall we?
Here is what you will need –
Fresh double bean pods – 500 gms*
Freshly grated coconut – 1/4 cup
Vegetable oil/sunflower oil, mustard seeds, turmeric powder, and asafoetida for tempering
Red chilli powder – 1 tsp or as per taste
Salt to taste
Maharashtrian goda masala or garam masala – 1.5 tsp
Kaccha masala – 1 tsp*
Jaggery – about 2 tsp
Water as needed
Freshly chopped coriander – for garnishing
Here is the step wise procedure –
Shell the pods and remove double beans, set aside. If you do not get fresh pods, you may check dry beans at your grocery store. If using dried beans, soak the beans in enough water overnight.
Wash the beans and boil the beans until you see the skin becomes wrinkled and somewhat loose. Remove the beans from water and set aside. Use the same water to cook your curry in.
In the mean time, when the beans are boiling, in a mixer jar, take grated coconut, red chilli powder, goda masala and kaccha masala. Add little water and blend to a very fine paste. Keep aside.
Heat oil in a deep vessel. Add in the mustard seeds and when they pop, add a generous pinch of asafoetida (asafoetida makes digesting the double beans easy on the stomach). Next, add the coconut and spices paste and roast on slow flame till the oil comes out.
Add the boiled beans, add two cups of water, and salt. Bring to a boil and cook of low to medium flame until the curry reaches desired consistency. Taste for salt, and chilli powder and add more to adjust the taste to your liking.
Add jaggery, and cook for 4-5 minutes.
Take off the heat, add fresh coriander and serve hot with chapati or rice!
Few notes –
Maharashtrian goda masala is a peculiar spice blend. If you do not get it you can use garam masala, but the taste will be not authtic Maharashtrian.
Kaccha masala – kaccha masala is a quick mixture of coriander seeds and cumin seeds. Take equal amounts of both and give a quick pulse in a mixer. It is called kaccha as in it is not roasted and the seeds are directly ground. You can make your own – do not make it into fine powder. Alternatively you can use coriander powder and cumin powder, but again the taste may differ.
As much as I love baking breads at home, I am always intimidated by the thought of wasting food if the recipe doesn’t work out.. and it’s especially true with the beast called yeast! Not all the time, yeast cooperates and gives you a beautiful bread!
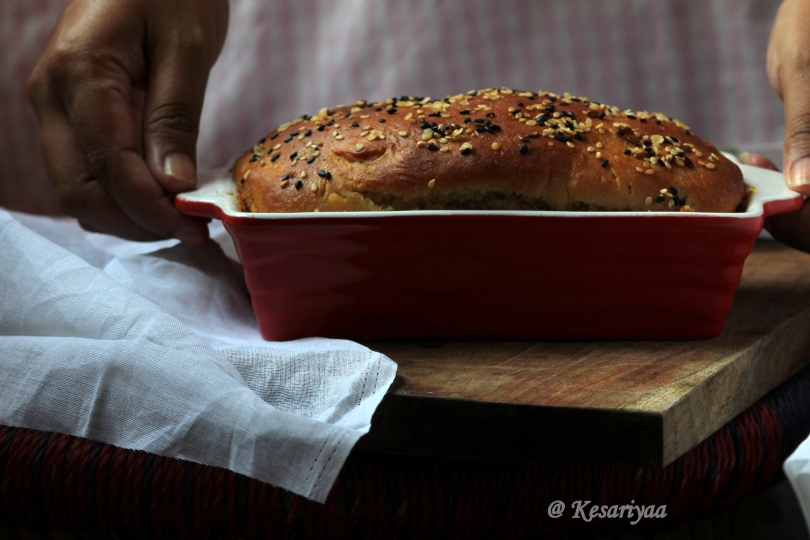
However, when I got a packet of instant active yeast this time, I was determined to bake a bread I have been dreaming about (yes I dream about food ;)).. We get a nice multigrain bread here from a local bakery topped with different seeds which we (I and dear husband) love. I wanted to replicate that but for a small batch for the two of us.
I wasn’t very sure about the measurements and proportions for flour and yeast and was searching aggressively for a good small batch bread recipe, and I found one here.
Everyone who bakes a bread says this and it is so so true – there is no other feeling like baking your own bread and it is such a stress buster! I absolutely feel elevated when the bread comes out of the oven – all crusty and fragrant, and the whole house smells like a quintessential little bakery! 😊
I made some sandwiches for us for the dinner. It was a perfect little weeknight meal. I am sure you will enjoy baking this bread as much as I did. So let us go straight to the recipe – shall we?
Ingredients-
Whole wheat flour – 1/2 cup
Otas flour – 1/4 cup*
Chickpea flour – 1/4 cup
All purpose flour (maida) – 1/4 cup
Amaranth (rajgira/ramdana) flour – 1/4 cup
Oil (any flavourless and odourless oil like vegetable oil or olive oil) – 1 tablespoon
Lukewarm water – 1/2 cup + 2 tablespoons
Active dry yeast – 1 and 1/2 teaspoon
Sugar – 2 teaspoons
Salt – 1 teaspoon
White sesame seeds, black sesame seeds, flax seeds and oats – to sprinkle the top of bread
Melted butter – to brush the baked bread
Here is the stepwise recipe –
In a big mixing bowl, take 1/4 cup warm water (reserve the other 1/4 cup and 2 tbsp water for later use). Add sugar and sprinkle the yeast. Stir with a spoon to somewhat dissolve the sugar. Add flour and mix with a wooden spoon to just combine the yeast mixture and flour. I used active yeast in this recipe, so I did not need to activate it first, however I rested this mixture for about 10 minutes.
Take the yeast and flour mixture on a lightly floured surface. Add salt, mix the dough together lightly. Start kneading the dough by adding more water. The dough needs to be very loose and it will be quite sticky at this stage. I used all the 1/4 cup + 2 tbsp water, but you may not need to use all of it. Make sure that the dough is not too stiff and use the quantity of water accordingly.
Add the oil and knead the dough for about 8-10 minutes, using very little flour only to not let the dough stick to your hands. Knead the dough using the base of your palms and rolling and gathering it back together. At the end of 10 minutes, the dough should be very elastic and sticking only very slightly.
Place this dough in a the same mixing bowl, coating the bowl with some oil first. Roll the dough upside down so that its coated with oil from all the sides. Rest the dough loosely covered with damp kitchen towel for about 40-45 minutes or until it is doubled in size.
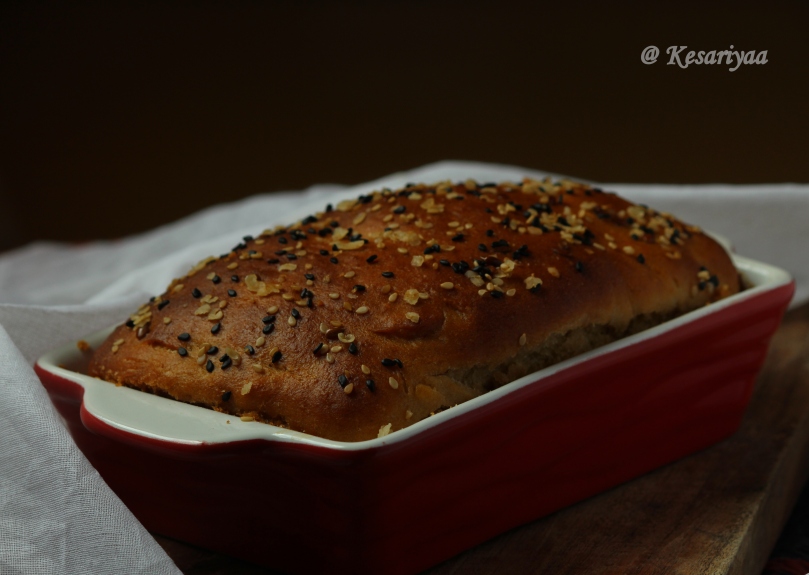
Take the baking dish, I used a 5 inches by 1.5 inches ceramic dish (pictured above). You could use similar baking dish or even a 5 inch cake tin to bake this bread. Alternatively, place a firm layer of aluminium foil strip to convert your regular loaf pan to convert into a smaller pan. Brush the baking dish/pan with oil.
Take the risen dough on the lightly floured surface again, punch the dough down knead for 3-4 minutes until its smooth and shiny. Make the dough into a rough rectangle of the size of your pan and start rolling lengthwise (start from the opposite end of yours and bring the dough towards you), pinching the seams as you roll. Pinch the sides and place the rolled dough in the prepared baking dish. Cover loosely with the damp towel and let rise until its doubled in size or it starts touching the edges of the pan and top of the dough is risen as such about half an inch above the rim of the baking dish.
In the meantime, when the dough is rising in the baking dish, preheat the oven to 200 degrees C, placing the tray on middle rack.
Sprinkle the risen dough with the seeds and bake the bread in preheated oven on the middle rack for about 35-40 minutes. If the top is browning too quickly, cover the top with aluminium foil making sure its not touching the top of the bread.
The bread is ready when it sounds hollow when tapped on the bottom (be careful while you check for this as the bread will still be hot).
Let the bread sit in the pan for a couple of minutes. Brush the top of bread with melted butter. Remove from the pan and let cool slightly on a cooling rack.
Serve warm with soup or salad or cool completely and slice to enjoy with tea/coffee or make sandwiches the way I did!
Notes –
Measure 1/4 oats and grind in a mixer to make oats flour. You can use any combination of flours you have in your kitchen.
The bread is not big enough to make regular sized sandwiches, the slices are small rectangles but it was sufficient as a light meal. This recipe makes about 11-12 slices of bread.
Believe it or not, it took me nearly 3 months to complete writing this post and I am updating it little by little everyday for almost a week now!
********************************
I have been meaning to post here for really long while. I always had enough ideas to post every week but something or the other stopped it from happening.. sometimes I cooked something but there was no time to take pictures, sometimes I managed to click a few photos but they were not of good quality or telling the story I had in mind and sometimes there was just no motivation.
Above all, how many people will read my blog or who is even missing reading it, was always a question that stopped me.
So why am I writing today?
I have been thinking very hard about the future of my blog.. and I realized that I didn’t want my blog go to dust! I started blogging for my love of food and writing (and the newly developed interest in photography at the time when I first started blogging). And I thought, I still cook, I would still love getting back to put my thoughts in words and I still keep taking pictures of food and other things.. so what is it stopping me from putting up a post here? – Of course, there are just so many things going on in everyday life, but doing what I like doing will only give me courage to put up with everyday struggles of life, right?
Probably, I was just waiting for some motivation – and that came in the form of my comment on one of the Instagram posts of Aparna ji from My Diverse Kitchen! She had posted a picture of colocasia leaves and I commented saying that we make curry from these leaves.
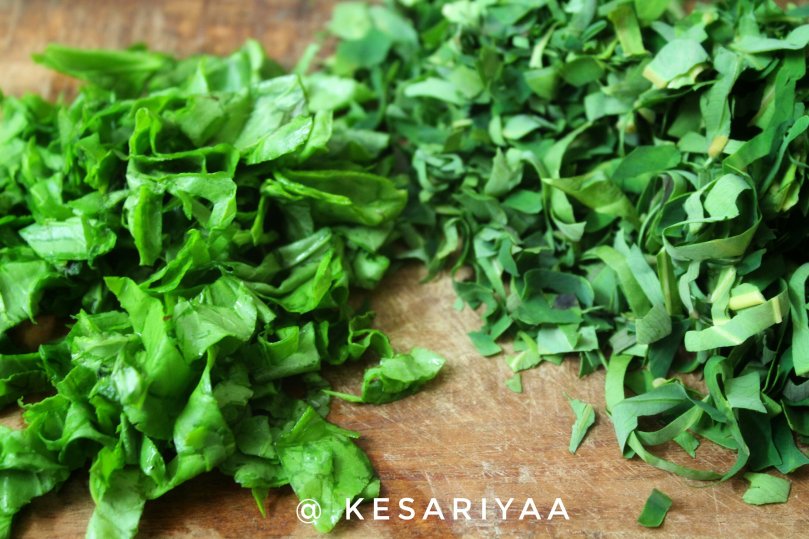
So, here I am.. after really really long time, writing about one curry that’s one of my top favorite food of all time! Let me present to you, aluchi patalbhaji or Maharashtrian style colocasia leaves curry.
Chopped! – Sorrel leaves on the left and colocasia leaves on the right…
Some of you might be familiar with patrode/patra/aluchiwadi (savory colocasia leaves rolls stuffed with spicy chickpeas flour batter and deep-fried) but did you know that you can make a delicious yet comforting curry out of these?
This curry called aluchi patal bhaji is made quite frequently during monsoon months because of its abundance and the dish is easy on stomach which fits in during heavy fasting season. There are also a lot of religious festivities which in the end demand for comforting food, and this curry fits the bill perfectly. It is also made on some special occasions like weddings.
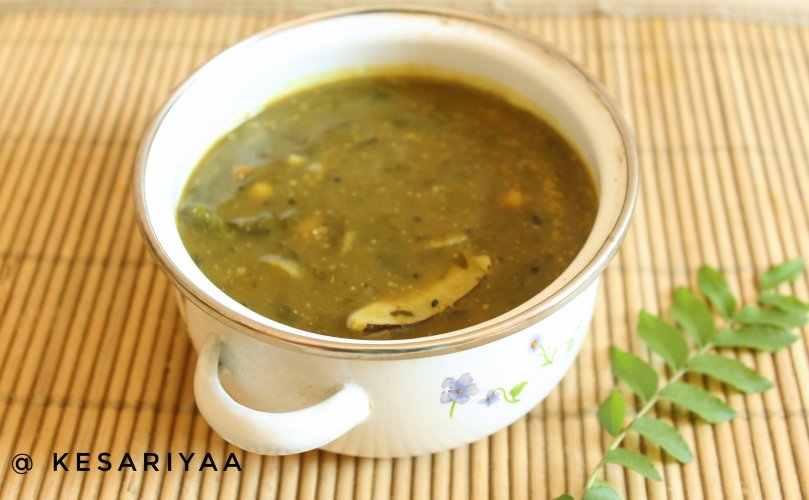
If this curry is made to the perfection you can actually drink it by bowls.. it is that tasty and unique!
This curry is quite easy to make although it requires a little bit of preparation ahead of making. Let’s get started!
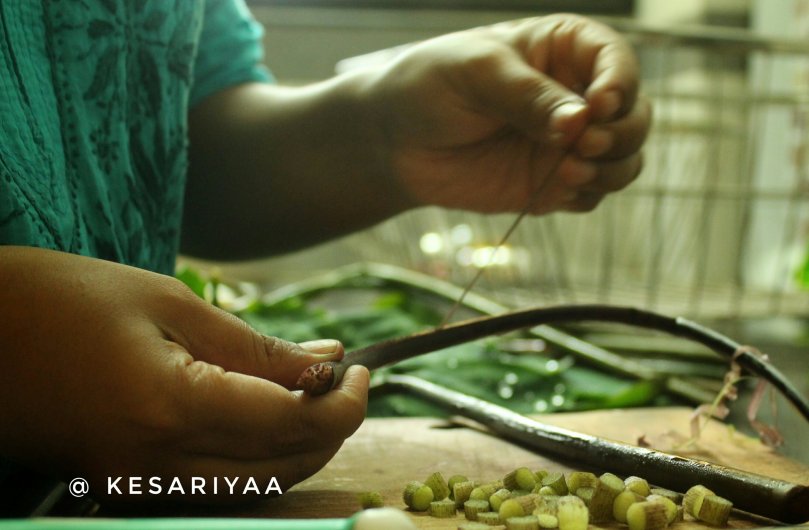
Removing skins from the colocasia stems.
What you will need~
1. 7-8 colocasia leaves – tender leaves with stems* (see notes)
2. Handful of sorrel leaves also called aambat chuka (optional)
3. A small radish chopped into thin slices
4. A small fistful peanuts and chana dal (split chickpea lentil) soaked in enough water for 4-5 hours
5. Small lemon sized ball of tamarind (or 2-3 tamarind pods) soaked in enough water for about an hour
6. Few slices of fresh or dry* coconut
7. 1 tablespoon chickpea flour
8. Oil, curry leaves, mustard seeds, turmeric, asafoetida and fenugreek seeds for tempering
9. 2 green chillies chopped into medium pieces or slit vertically but not splitting into two pieces
10. Salt, red chilli powder and jaggery to taste
Here is the step wise procedure~
1. 4-5 hours before you plan to make the curry, soak a fistful of raw peanuts and chickpeas lentils in enough water. Also soak tamarind of the size of small lemon in the water.
2. Cut the stems from leaves and clean colocasia leaves with damp cloth. Clean sorrel leaves (if using) in running water or in a salad spinner. Finely chop colocasia leaves and sorrel leaves. Remove outer skin of the stems and chop them in small pieces. Adding stems to this curry gives it a nice texture but if you don’t find the leaves with stems you can skip those. Pressure cook both colocasia leaves and sorrel leaves along with chopped stems (together or separately) for two whistles.
3. While the leaves are cooking and then cooling down, peel the radish and chop into slices and slices into half circles. Keep aside. Squeeze the tamarind pulp and discard the pods. Chop/slit green chillies, chop coconut into thin slices. If using dry coconut, you can soak the slices in some warm water.
4. Once cooled, mash the cooked leaves with wooden spoon. Add chickpea flour and mix well to remove lumps. Add some water to loosen up the mixture. Set aside.
5. Gather all the ingredients for tempering. Heat oil in a pan, add mustard seeds, fenugreek seeds, asafoetida, turmeric and curry leaves. Then add green chillies. Add chopped radish and cook on low to medium flame till radish is slightly cooked. Add a spoonful of water so as not to burn the tempering.
6. Next, add the leaves and chickpea flour mixture. Add about half a cup of water and stir to combine. Add the water with tamarind pulp. Add coconut slices, peanuts and chickpea lentils.
7. Season the curry with about half a teaspoon of red chilli powder, and salt to taste. Add jaggery as per your liking. The curry should not be very sweet but it should balance the sour taste of tamarind.
8. Boil the curry on low flame covered with lid till it thickens to a soup-like consistency. This curry is not very thin but it thickens ever so slightly as it cools down, so keep the consistency on a looser side if you do not plan to serve it immediately.
This curry is best served with steamed white rice with a dollop of ghee. It also pairs nice with Maharashtrian style masale bhat (rice preparation with veggies and spice mix). You can eat the curry with chapatis too.
This recipe makes enough curry to serve a family of four.
Do make this curry and let me know how you like it!
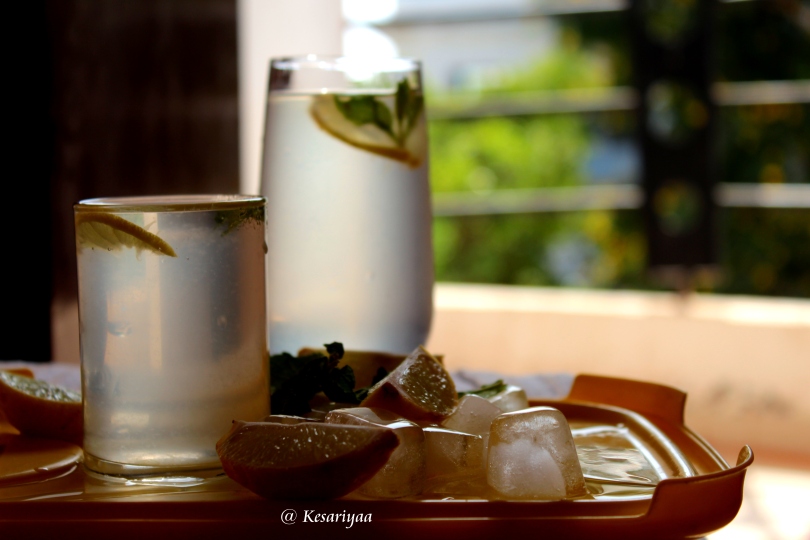
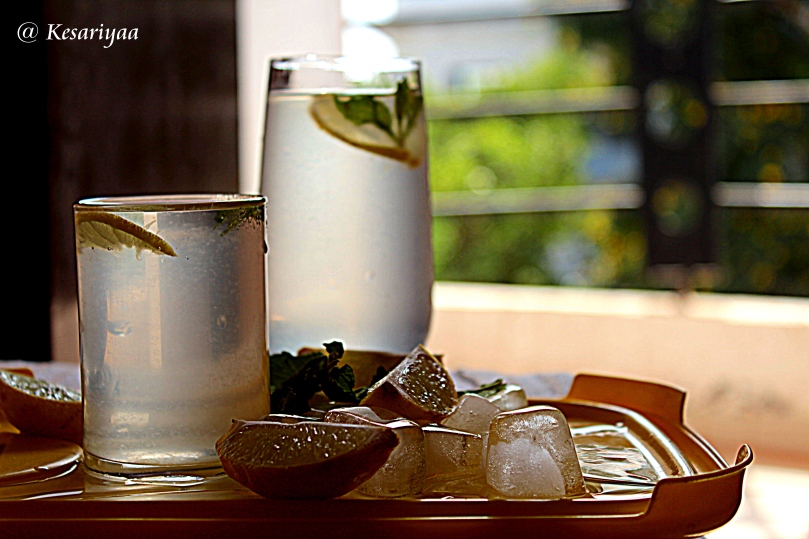
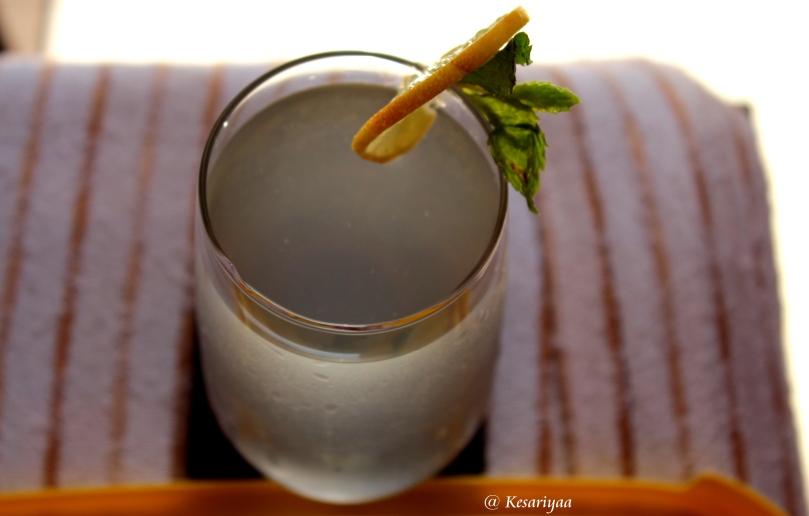
There are always some dishes associated with season, occasion and stages of life. When summers hit hard and when kids are home during summer holidays, the first and foremost thing mothers (and in general all the folks) think about is our very humble and old nimbu pani or limbu sarbat. With the increasing need of hydrating oneself, how can we not go grab a glass of this easy drink? And what could be the easiest way to welcome your guests?
With the recipe I am sharing with you today, you don’t have to squeeze those lemons every now and then, and keep fishing for the seeds else they dive into somebody’s stomach!
This easy to make lemon syrup is surely going to be a hit with you… just 3 (sugar, water and of course lemons) ingredients (well, you can count salt, the 4th one if you want to be precise)…and a wee bit of patience… the reward is the easiest way to make nimbu pani or whatever drink you want to put up…because this syrup can also be added to any other fruit juice to make a fancy drink.
Here is what you will need-
Juice of 12 big lemons – strained to remove any seeds and lemon particles
Sugar – 2 and 1/2 cup
Water – 3/4 cup
Salt – 2 tsp
Instructions –
Add sugar and water in the pot. Mix properly and bring to boil. Boil the syrup to a soft ball consistency.
Once the syrup reaches the desired consistency, turn of the heat and add the lemon juice. Stir the mixture so that the lemon juice mixes well with the syrup. Keep stirring the mixture once in a while till it comes to room temperature. Add the salt and mix well. You can use rock/black salt as well.
Your lemon syrup is ready, store the syrup in a clean sterilized glass jar. You can keep the mixture in the fridge but it stays well even at the room temperature. To make nimbu pani or lemonade, take 2 tbsp of syrup in a glass and 1 glass of cold water. You could as well add ice. Mix well and serve chilled.
Note: The above quantity makes little less than 2 cups of lemon syrup or around 20 medium size glasses of lemonade. You could add strawberry or other fruit juices to make flavored lemonade.
Let me know if you make my recipes, I would like to know your feedback and suggestions!
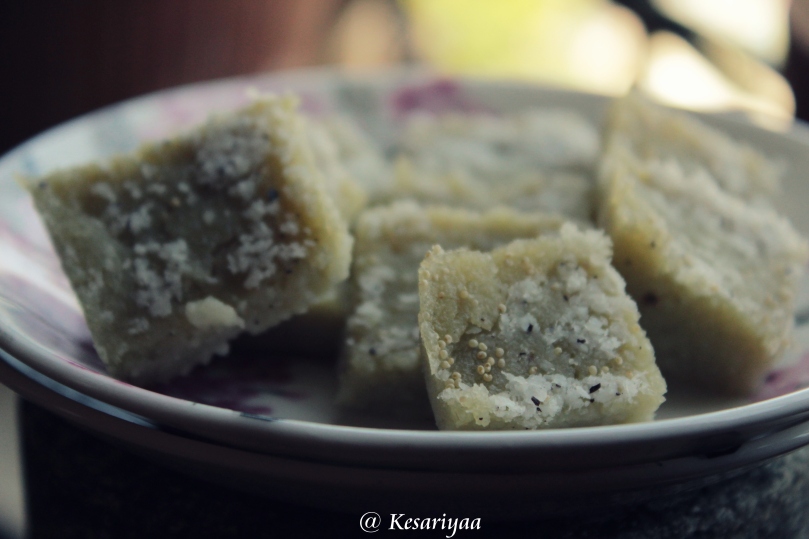
Some food memories stay with you for the eternity… and some people leave their mark on your life through the food they cook…you might forget any other traits of that person but usually you will not forget the best dish that someone makes! So is the case of this Khandavi recipe. One of my school teachers used to make this Maharashtrian style fudge and used to distribute among her students on various occassions.. probably this was her favorite dish too…she used to make it quite frequently.
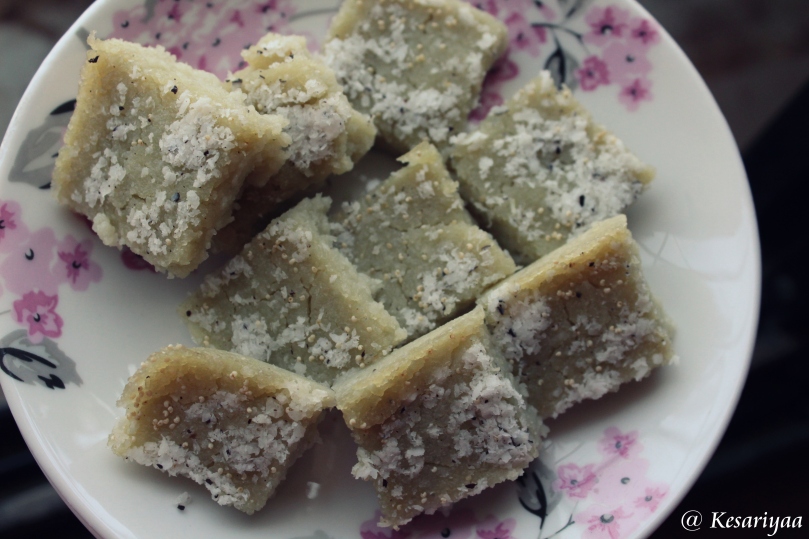
Maharashtrian khandavi is way different from her synonymous which is Gujarati khandavi. This khandavi is a sweet dish made up of sugar cane juice (you read that right!), rice flour and fresh or dried coconut. On the other hand, Gujarati khandavi (which we Maharashtrians refer to as ‘suralichi vadi’) is a savory roll made up of cooking cheak pea flour cooked in buttermilk and stuffed with freshly grated coconut, fresh coriander and then tempered with mustard, cumin and green chilies. Though I like both equally, it must have been ages since I had the recipe I am presenting to you today!
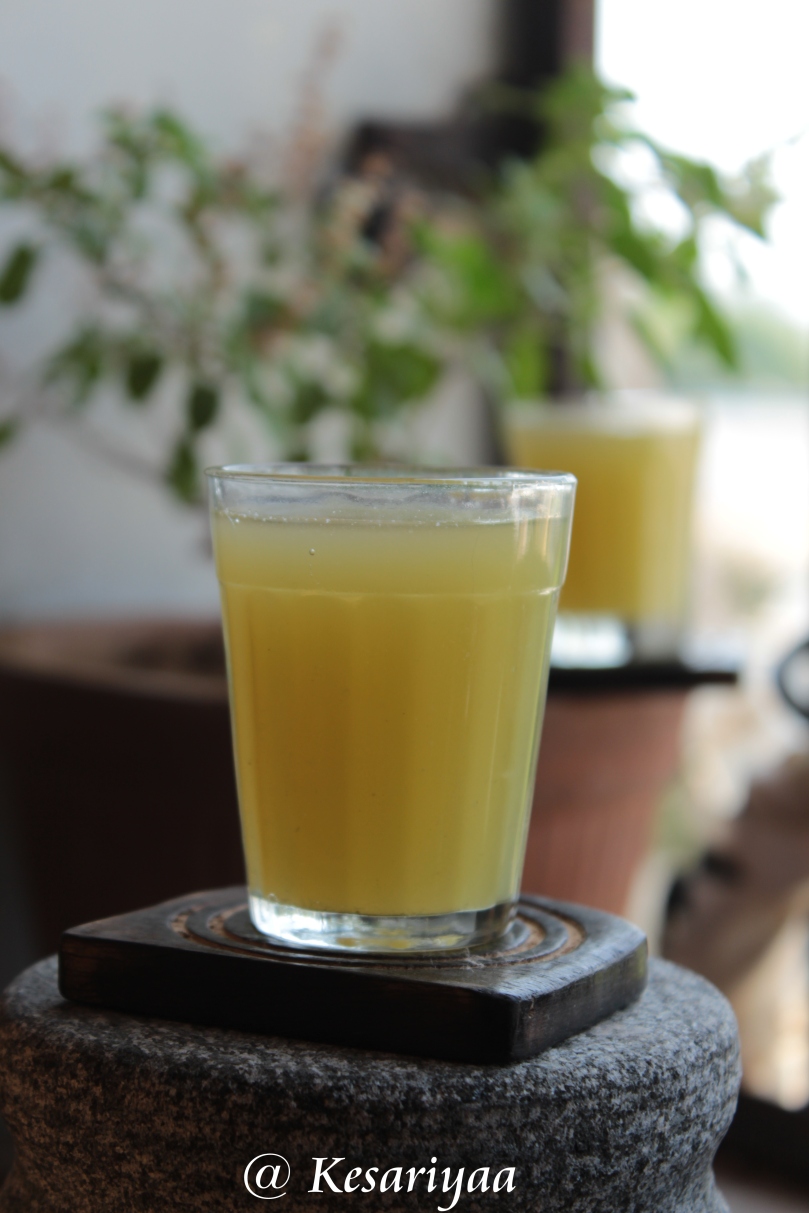
Khandavi is sweet dish which is only mildly sweet and its most commonly sweetened with fresh sugar cane juice…of course, when it is not available one can use jaggery dissolved in water.. but believe me it is nowhere close to this version which uses sugar case juice. Also, you will be presented with this very subtle aqua green color… I was explaining what khandavi is to my neighbor (who quickly became a good friend) during our daily chitchats and I told her about the color and when I made it, it was the exact color I had been dreaming about… I still vividly remember the color and taste when our teacher used to give this to us! I was truly happy that I could recreate those memories…
Fresh sugar cane juice
So here is what you will need to make this fudge –
Fresh sugarcane juice – 1 cup (ask your juicewala not to add ice, ginger and lemon)
Coarsely ground rice flour – 1/2 cup
Fresh or dry grated coconut – 1/4 cup (I used dry coconut or khobra) plus 1/2 tbsp for garnishing on top
Green cardamom powder – as per your liking
Poppy seeds – a small spoonfull to sprinkle on top
Ghee – 1/2 tbsp plus some more for greasing the tray
Procedure –
A day before you plan to make khandavi, soak 1/2 rice in enough water. Let soak for about 4-6 hours, drain and spread on a kitchen cloth to dry. Once the rice is completely dry, grind to a coarse meal. Set aside.
Prepare a plate or tray by greasing it with ghee. Keep aside.
To make the fudge, heat ghee in a wide pan. Add 1/2 cup rice flour and roast on a slow flame till it changes the color to light pink and it gives a roasted smell.
Turn off the heat. Add 1 cup sugar cane juice and stir well not allowing lumps to form. Quickly add the coconut. Return to heat, keep stirring the mixture. Cover with lid and let it steam cook for a minute or so till all the mixture pulls away from the sides and bottom of the pan.
Pour the mixture into prepared plate/tray and spread evenly. Sprinkle with reserved coconut and poppy seeds, press a little so that they stick on top of the fudge. Let the fudge cool a little bit. Cut in desired shape with a knife washing it in running water after each cut.
Let the fudge cool down completely. You can refrigerate it for some time if it still looks like not completely set.
This fudge can also be served warm with little more freshly grated coconut and ghee.
As always, I would love to hear your feedback and suggestions!